


If you’re anything like me, you’ve been dreaming of making your own quilted jacket. From Anthropologie to Walmart, quilted or patchwork anything is having its moment in the fashion world! If you’re ready to go for it, this post is for you. We’ll walk you step-by-step through the process of sewing your own quilted jacket using Grainline Studio’s Tamarack Jacket pattern!
Before we dive in, here’s an overview of all seven steps:
Step 1: Select your pattern and size.
Step 2: Gather materials.
Step 3: Sew your quilt blocks. (*I did mine on my embroidery machine using Perfectly Pieced by ME Time!)
Step 4: Construct your new “fabric” using quilt blocks.
Step 5: Make a quilt sandwich.
Step 6: Quilt your fabric.
Step 7: Sew your jacket together and bind.
And that’s it!
*Note: If you haven’t heard about Perfectly Pieced by ME Time, here’s what you need to know! ME Time offers complete machine embroidery experiences delivered right to your doorstep. Each box includes embroidery files, step-by-step instructions, fabric, embellishments, notions, and sometimes even thread, so you have everything you need to complete a beautiful project. With Perfectly Pieced, one of ME Time’s monthly subscriptions, you’ll discover the life-changing simplicity of piecing and quilting in-the-hoop! We’re talking PERFECT quilt blocks every time! It’s a total game-changer!
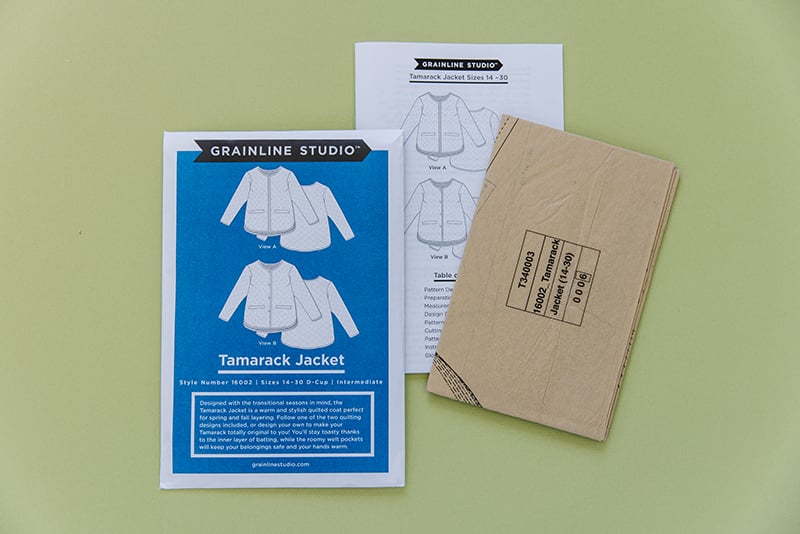
Step 1: Select your pattern and size. When I found Grainline Studio’s Tamarack Jacket sewing pattern for a whole-cloth quilted jacket, I knew I’d found the perfect pattern. The Tamarack Jacket pattern feels like it was made specifically for this project because it’s constructed just like a quilt. If you know the basics of quilting, this pattern is totally doable, even if you don’t have much apparel sewing experience! There are only three pattern pieces (unless you add the welt pockets, which I didn’t): the back, the front, and the sleeve. Using quilt blocks from Perfectly Pieced by ME Time, I was able to follow the pattern and complete a gorgeous quilted jacket!
Note: The Tamarack Jacket is somewhat fitted. If you want to use your jacket as an overcoat, or just want an oversized look, I recommend going up two sizes. My measurements indicated a size 6, so I made a size 10 and am really happy with the results. I also added 6” to the length of the jacket, because I wanted mine to be a little longer.
You may purchase the Tamarack Jacket Pattern here:
Tamarack Jacket (0-18): https://metimedelivered.com/product/tamarack-jacket-0-18/
Tamarack Jacket (14-30): https://metimedelivered.com/product/tamarack-jacket-14-30/
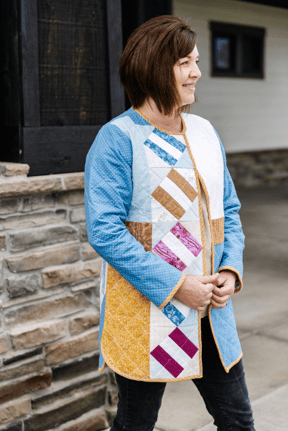
Step 2: Gather your materials. I don’t know about you, but picking out fabrics is my favorite part of any sewing project! I picked a fabric palette using the October 2022 Perfectly Pieced fabric bundle. I suggest you search “quilted jacket” on Pinterest, find a quilt you love, and copy the color palette. Here are the fabrics I chose, all pre-washed and ironed.
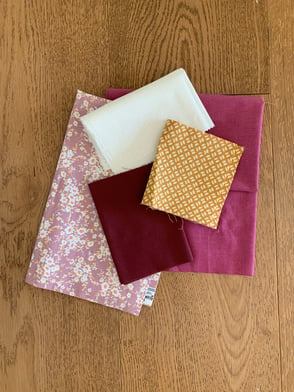
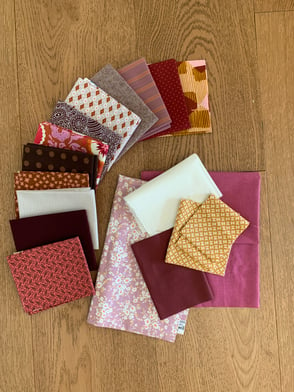
The pattern called for 2.5 yards each of the main fabric and the lining. (This will vary depending on the size of your jacket.) Since I knew I’d be covering the back of my jacket with quilt blocks, I guessed and bought 2 yards of my main fabric (the blue), and had plenty. I bought the full 2.5 yards of the lining. For the quilt blocks, I purchased 10 fat quarters in a variety of patterns in my color palette. I had plenty of fabric to work with! You’ll also need fabric for the binding. I recommend using a patterned fabric for the binding, as it will be more forgiving and hide any little mistakes. Don’t forget to choose high-quality quilting batting; it will give your jacket warmth and stability. I used Kimberbell’s Project Batting, and it worked wonderfully. I did have to seam the batting for the back of the jacket.
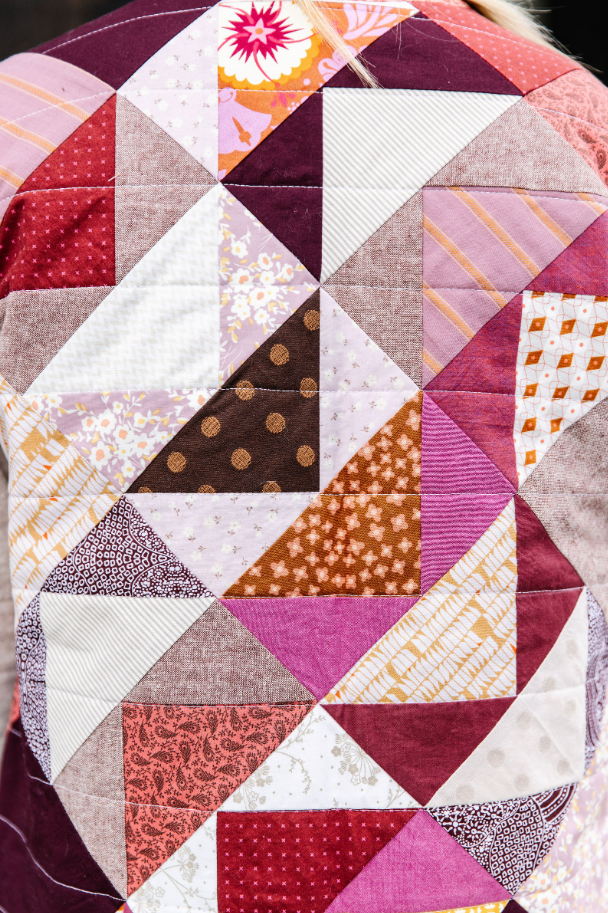
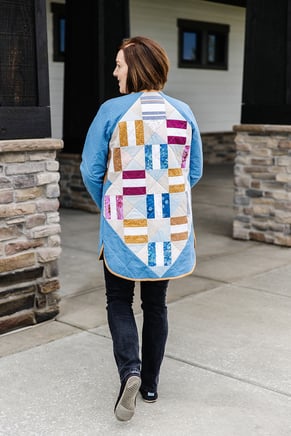
Step 3: Sew your quilt blocks. The number of blocks you need depends on the size of your jacket, the size of block you use, and how much of the jacket you want pieced. I made a total of ten 6" blocks from the October 2022 Perfectly Pieced files and eight 4" blocks from the July 2022 Perfectly Pieced files. I didn’t really have an exact plan for how I’d use them, and as I made blocks I kept playing with them, rearranging and tumbling them until I found the pattern I wanted. This part was so fun! But a well-thought-out plan wouldn’t hurt!
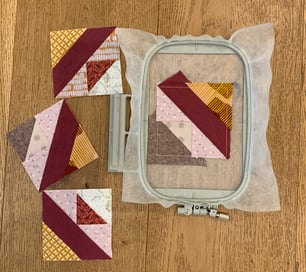
All my quilt blocks were made on an embroidery machine. The wonderful thing about Perfectly Pieced blocks is that they turn out perfect every time. They’re always the same size, the blocks and points always line up, and they’re so easy to do! If you subscribe to Perfectly Pieced, you can use any block you’d like—or even mix them. Perfectly Pieced gives you embroidery files for 2”, 4”, 6”, and 8” blocks every month. You can try it for yourself with our free sample 4” quilt block! If you’d like to see how quilt blocks are pieced and quilted in the hoop of an embroidery machine, watch this short video.
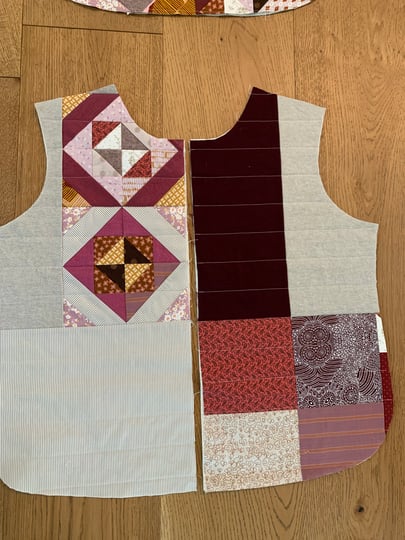
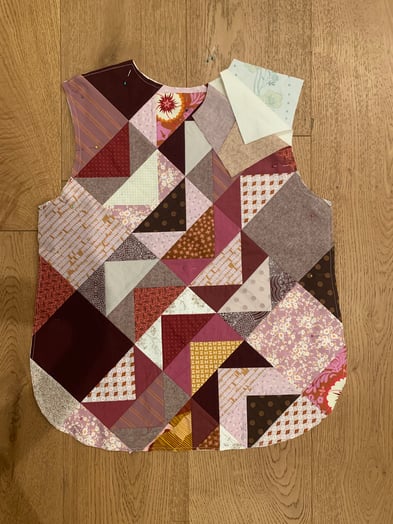
Step 4: Construct your new “fabric” using quilt blocks, or a combination of quilt blocks and fabric. You’ll have to decide how much of the jacket will be made of pieced quilt blocks. You can construct the whole thing with quilt blocks, or you can choose parts of it to leave as whole cloth. For my jacket, I left the sleeves as plain fabric, used a few quilt blocks on the front, and then concentrated the quilt blocks on the back!

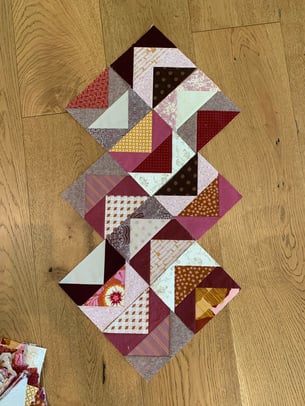
I filled in the remaining space with plain 6" blocks. Here’s the block placement I decided on before sewing the blocks together. I filled in the remaining space with my main blue fabric. No need to be super precise with the outside edges here! Just make sure your pattern piece fits on your new pieced fabric.
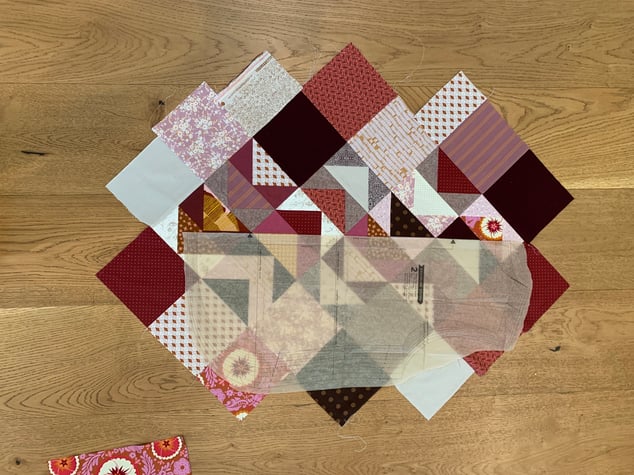
Step 5: Make a quilt sandwich. From here on out, you’ll follow the Tamarack pattern to the letter! I followed the instructions exactly, and it worked great. (I skipped the welt pockets. They would have interfered with my design. 🙂)
You essentially make a quilt sandwich the same as when you put together a quilt: pieced fabric on top, batting in the middle, and lining on the bottom. This picture is of my quilt sandwich after I cut out the pattern piece.
Cut out your pre-quilted fabric using your sewing pattern.
I added 6” to the length of my jacket.
Step 6: Quilt your fabric. I quilted my jacket pieces with straight horizontal lines. The Tamarack pattern recommends this or a diamond quilting pattern. I did this with a walking foot on my sewing machine.
You have two options for quilting as a Perfectly Pieced subscriber for quilting right on your embroidery machine. Use the custom block-by-block quilting that comes with your files to quilt your blocks as you stitch them. Alternately, you can use the unique allover quilting design you receive each month. This allover quilting method uses a tool by Kimberbell called Clear Blue Tiles to place and mark where the quilting goes. Subscribers receive two sample Clear Blue Tiles in their first Perfectly Pieced box, along with instructions on how to use them!
Step 7: Sew your jacket together and bind.
There are only 3 seams to put this jacket together! First, stitch the shoulder seams. Then, add your binding. Finally, attach the sleeve pieces to the shoulder seams and stitch up the side seams!
.png?width=297&name=unnamed%20(10).png)
.png?width=298&name=unnamed%20(9).png)
The binding is added just like when binding a quilt. You'll create your binding as a double-fold bias tape using 2” strips. These must be cut on the bias, as the hem of the jacket is curved. If you cut your binding straight across the width of your fabric, it will twist and pucker on the curves. Cutting your binding strips on the bias makes binding so much easier and creates a nicer end result! The Tamarack pattern will walk you through the binding process in detail. (Looking for a shortcut? Purchase ½” double-fold cotton bias tape!) I recommend using starch when ironing your bias binding strips.
Voila, you’re done! Now all that’s left to do is show off your beautiful new jacket. Enjoy! 🥰
Some additional tips and ideas:
-
- Vary your fabric selections! You’ll want a few geometrics, some small florals, and textured solids. For a really modern look, go with all solids. If you want a softer-looking jacket, choose similar pale hues without much contrast.
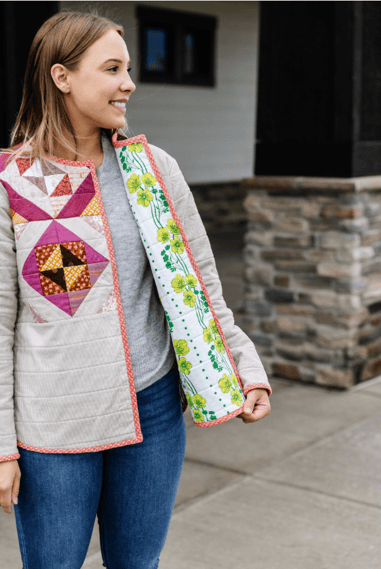
I made an additional jacket using the August 2022 Perfectly Pieced 6" block
- Vary your fabric selections! You’ll want a few geometrics, some small florals, and textured solids. For a really modern look, go with all solids. If you want a softer-looking jacket, choose similar pale hues without much contrast.
-
- For a fully reversible jacket, add binding to the inside seams.
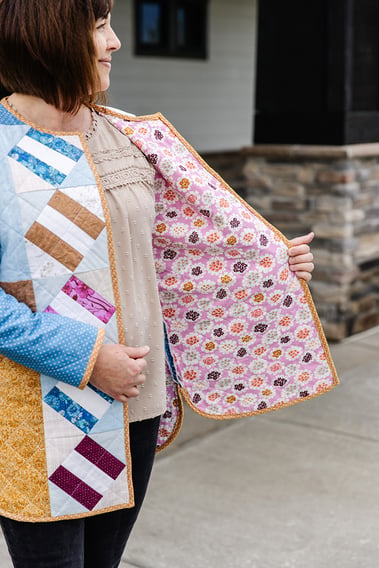
- Go bold with your lining! This is a chance to use a really fun print you might not have the guts to use on the outside of your jacket.
- For a fully reversible jacket, add binding to the inside seams.
-
- A really big shortcut is to purchase ½” double fold bias tape, instead of making your own. You can buy this at any big box fabric store, and it will save you a lot of time! The only drawback is that you’ll be limited in your color selection.
- Want to add a collar or hood to your jacket? Grainline Studio has an add-on pattern, available for purchase on their website only, for a collar, hood, and patch pocket.
- There are oodles of jacket patterns out there that will work beautifully for this project. Simply follow the steps outlined in this post in conjunction with your pattern. Keep in mind that simple, boxy patterns will work best.
- A really big shortcut is to purchase ½” double fold bias tape, instead of making your own. You can buy this at any big box fabric store, and it will save you a lot of time! The only drawback is that you’ll be limited in your color selection.
I hope this gives you the confidence to try making a quilted jacket yourself. It was a lot of fun! So much fun that I had to make a second and am already working on a third! If you want more quilting inspiration, join our Facebook group and get more ideas from a community of quilters and machine embroiderers.
ABOUT ME TIME: Every machine embroiderer knows how frustrating it can be to find the time and materials to start a new project. ME Time delivers complete machine embroidery experiences right to your doorstep so you can start creating the moment you're ready!
Click to learn more about ME Time subscriptions.