Hey there, embroidery enthusiasts! Are you looking to jazz up your home decor? Maybe you want to create unique gifts or dive into a new, fun, and fulfilling hobby. If so, then you’ve come to the right place.
Picture this: with just a bit of know-how, some thread, and a trusty embroidery machine, you can transform plain fabrics into personalized masterpieces. Want to learn how and get on the path to creating your next machine embroidery magnum opus? Let this article be your beginner’s guide to the in-the-hoop machine embroidery technique.
What Is In-the-Hoop Machine Embroidery?
In-the-hoop (ITH) machine embroidery is a fantastic technique where you do almost all of the embroidery work in your machine’s embroidery hoop. This means that rather than stitching parts separately and then assembling them, the machine does the bulk of the work for you, stitching everything together right in the hoop.
This method is great for making a wide range of projects, including bags, toys, and home decor items. One of the biggest perks of ITH embroidery is its precision and consistency, ensuring your designs come out perfect every time!

Essential Supplies and Equipment
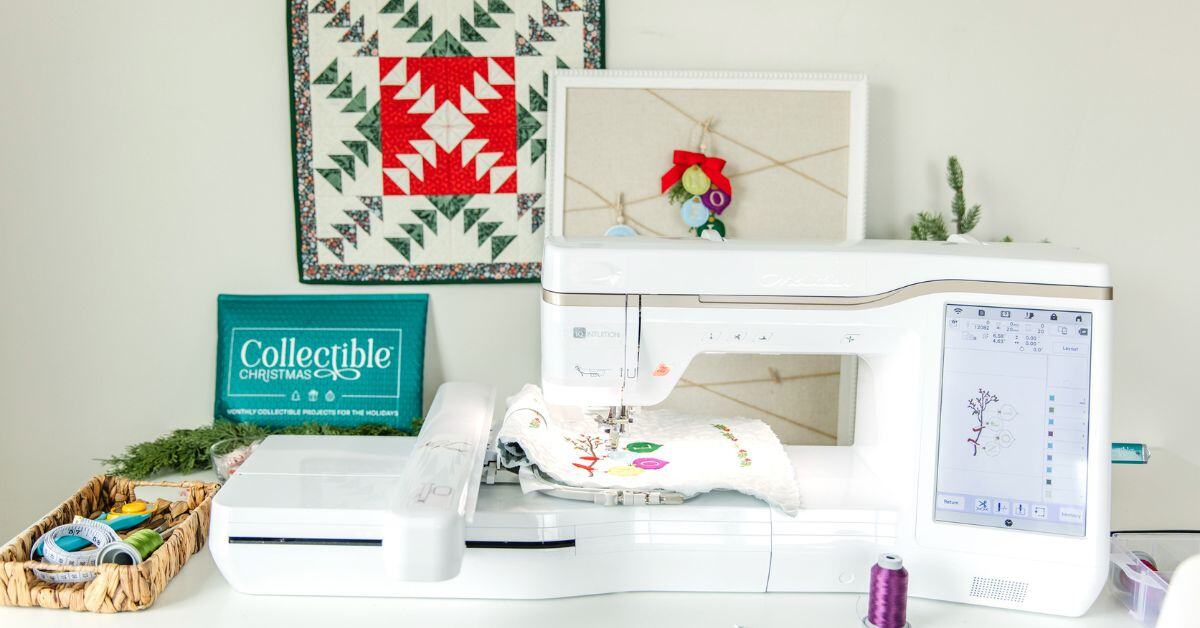
Alright, let’s talk about what you’ll need to get started with in-the-hoop machine embroidery. First up, you’ll need an embroidery machine that’s compatible with in-the-hoop designs. It doesn’t have to be the fanciest model on the market, but make sure it has a good range of hoop sizes.
Next, you’ll need a stabilizer. This is crucial as it keeps your fabric from puckering and shifting while the machine stitches your design. There are different types of stabilizers, but a good cut-away or tear-away stabilizer should do the trick.
You’ll also need some quality embroidery thread. This isn’t the place to skimp—invest in good thread to ensure your designs are vibrant and durable. Bobbin thread is another must-have, as it helps form the stitches on the underside of your fabric.
Don’t forget your fabric! Choose something suitable for your project—cotton, linen, or a nice blend. Natural fibers typically give the best results.
Lastly, gather your embroidery scissors for trimming threads and any embroidery-specific supplies your project might call for, like batting for quilts or stuffing for plush toys. With all these at hand, you’re well on your way to creating something amazing!
Step-by-Step Guide to Your First In-the-Hoop Project
Selecting a Design
Alright, now that you’re all geared up, pick out a design for your first in-the-hoop project. The great thing about this technique is that there’s a vast array of designs available, from simple shapes to intricate patterns. To start, I’d recommend choosing a beginner-friendly design—think small pouches, coasters, or keychains. These projects are manageable and will help you get a feel for working with your machine.
When selecting your design, check that it matches the hoop size of your embroidery machine. Most designs come with specifications so that you’ll know what you’re getting into. Additionally, many websites offer free or low-cost in-the-hoop designs. This way, you won’t have to break the bank on your first try.
Once you’ve chosen your design, download it to your computer and transfer it to your embroidery machine. Follow the manufacturer’s instructions for your specific machine model, and you’ll be all set to start the actual embroidery.
Preparing Your Fabric and Hoop
Now that you have your design loaded, let’s get your fabric ready. First, cut your fabric slightly larger than your hoop size to ensure there’s enough room to secure it properly. Lay your fabric flat and smooth out any wrinkles because, trust me, they’ll get in the way.
Next, grab your stabilizer and cut a piece that matches the size of your fabric. Lay the stabilizer on the underside of your fabric. If you’re using an adhesive stabilizer, peel off the backing and stick it to the fabric. Otherwise, you can pin or baste the stabilizer if needed.
Place the fabric and stabilizer into the embroidery hoop, making sure everything is taut but not overly stretched. Tighten the screw on the hoop to secure your fabric in place. A snug fit will prevent any shifting or puckering while your machine works its magic.
Loading and Positioning the Design on Your Machine
Here comes the fun part—loading and positioning your design! First, make sure your embroidery machine is on and your hoop is securely attached. You’ll want to refer to your machine’s manual for specific instructions, but generally speaking, you’ll navigate through your machine’s display screen to locate the design file you transferred earlier. Once you’ve selected it, the design should appear on the screen.
Now, you’ll want to position the design correctly. Most machines have a function that lets you adjust the placement so that your design ends up exactly where you want it on the fabric. Take your time here and use the on-screen grid to align everything. It’s better to spend a few extra minutes ensuring perfect placement than having to redo the whole thing!
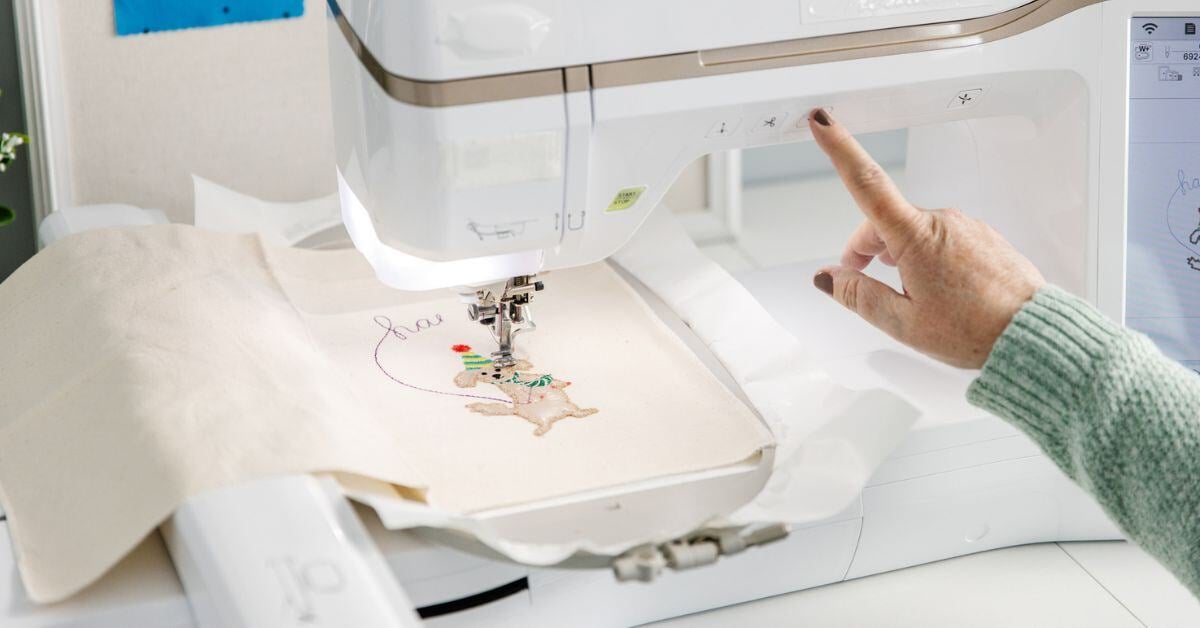
Once you’re happy with the positioning, set your machine to start stitching. Double-check that you’ve threaded the machine correctly and that you loaded the bobbin with the appropriate thread. Then, take a deep breath and press start. Your machine will take it from here, working its magic as you sit back and watch your design come to life.

Monitoring the Embroidery Process
You’ve pressed start, but your job isn’t over just yet! You can walk away from your machine, but don’t stray too far and consistently check in with your machine’s progress. This is especially important with larger or more intricate designs, as issues can pop up unexpectedly.
Watch for things like thread breaks or tangles—these can happen even with the best threads. If a thread break occurs, pause the machine and re-thread it, following the manufacturer’s instructions. Also, keep an eye on the bobbin thread; sometimes, it runs out faster than you’d expect, and you’ll need to replace it to avoid any gaps in your design.
Stay attentive to the fabric’s position within the hoop; make sure it doesn’t shift or pucker. If you notice any issues, pause the machine and adjust the fabric.
Removing and Finishing Your Project
Before you call your project done, let’s add those final touches to make it truly shine.
Take a close look at your embroidered piece; if there are any stray threads, snip them off with your embroidery scissors. Next, if your project has a bit of puckering or wrinkles, give it a gentle press with an iron set to the appropriate heat for your fabric. Be careful here—use a pressing cloth to protect your stitches and avoid flattening your design.
Lastly, give your project a final once-over. Does it look like you envisioned? Great! Now you can show it off.
Now that you’ve reviewed this beginner’s guide to in-the-hoop machine embroidery, what’s next on the horizon? Perhaps a custom pillow, a fun keychain, or even a personalized monogram for a special someone? If you want to keep creating fun, exciting, and beautiful ITH projects, the ME Time subscription service has an incredible array of in-the-hoop embroidery quilt blocks so that you can grow a fabulous embroidered collection.